How to Join NPS? How to Join NPS Online?
Outlined below are different modes to join NPS:
(1) Government/ Corporate Sector: To enrol under Central Government/ State government Sector, you may approach your HR Dept./ Pay and Accounts Office (the Nodal Office for NPS). The formalities to be completed, in guidance and through of the Nodal Office.
(2) Online Facility: Any citizen of India, who meets the stipulated eligible conditions, can open his/her NPS account through online facility. Through this facility NPS account holders can also make subsequent contributions to their account hassle free using Net Banking/ Debit Card/ Credit Card.
(3) Offline Facility: Entities called as Point of Presence (POP) are appointed by PFRDA for servicing the individual subscribers, including their registration and acceptance of further contributions. You can collect the registration form for joining NPS from any of the Point of Presence - Service Providers (POP-SP).
How to Join NPS Online?
Keep the following documents ready with you before proceeding for joining NPS online:
- Scanned copy of Passport size photograph (file size between 4KB and 5MB)
- Scanned copy of PAN in jpg or png format, PAN should be linked to bank account (file size between 4KB and 2MB)
- Scanned copy of Cancelled cheque in jpg or png format (file size between 4KB and 2MB)
- Net banking facility, debit or credit card
- Aadhaar registered mobile number for eSign purpose
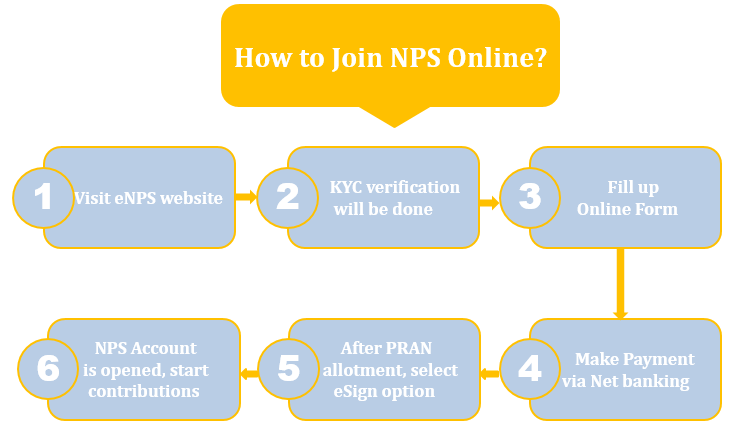
Outlined below are the steps to join NPS online:
- Visit eNPS website
- Fill up all the mandatory details online
- Your KYC verification will be done by the Bank/Non-Bank POP selected by you during the registration process
- Upload scanned copy of PAN card and Cancelled Cheque in jpg or png format having file size between 4KB and 2MB
- Upload your scanned photograph and signature in jpg or png format having file size between 4KB and 5MB
- After that you will be routed to a payment gateway for making the payment towards your NPS account via Internet Banking
- After successful receipt of clear funds from Payment Gateway Service Provider, NPS contributions will be credited in your PRAN on T+2 basis
- After Permanent Retirement Account Number (PRAN) is allotted, subscriber can use any one of the following two options:
- Option 1: eSign
- Select 'eSign' option in the "eSign / Print & Courier page"
- OTP for the purpose of authentication will be sent to your mobile number registered with the Aadhaar
- After Authentication of Aadhaar, Registration form will be successfully eSigned
- Once a document is eSigned, you need not send the physical copy of form to CRA
- eSign service charges plus taxes applicable is Rs. 25.90 (including UIDAI charge of Rs. 20)
- Option 2: Print and Courier
- Select 'Print & Courier' option in the "eSign / Print & Courier page"
- Take a printout of the form
- Affix your photograph (please do not sign across the photograph) on the form & sign on the block provided for signature
- Send the form to CRA at the following address within 30 days from the date of allotment of PRAN or the PRAN will be 'frozen' temporarily
- Address: Central Recordkeeping Agency (eNPS), NSDL e-Governance Infrastructure Limited, 1st Floor, Times Tower, Kamala Mills Compound, Senapati Bapat Marg, Lower Parel, Mumbai 400013
- Option 1: eSign
You can understand the same easily with the help of following stepwise presentation:
